The inspectagram® Process
The inspectagram process is built around a simple, repeatable workflow that allows you to move through the home efficiently while creating a complete and consistent report.
For every section of the template:
1. Baseline → 2. Black Box → 3. Extras (including Focus Pages) → Repeat
Trust the template, follow the workflow and let it guide your inspection.
Why This Matters
The purpose of a home inspection is to document the home's inventory and condition — the good and the bad.
To make that process as simple and consistent as possible, inspectagram was designed to eliminate decision fatigue.
The Baseline Pro template already contains approximately 99% of the components found in a typical home inspection. Rather than deciding what to inspect next or where to document your findings, simply work through the template from left to right.
Every section follows the same structure:
1. Baseline → 2. Black Box → 3. Extras (including Focus Pages)
The process isn't there to slow you down. It's there to free up your brain to notice what matters. By letting the template guide the workflow, you can focus on observing the home instead of deciding what to inspect next or where to record it.
Follow this for each section:
1. Complete the Baseline by working through the icons from left to right.
2. Capture additional text-only observations in the Black Box page by typing your notes or using talk-to-text.
3. Document photo-based deficiencies or additional components using the appropriate Extras page or pre-built Focus Page.
4. Move to the next section and repeat.
Once the inspection is complete, finish the remaining report preparation tasks by completing the Insurance section, generating the Summary and performing a final review before publishing. These topics are covered in their own dedicated articles.
The icons are not simply photo locations. They create the flow of the inspection.
By documenting the Baseline first and the exceptions second, you stay focused on the workflow, reduce backtracking and create a more efficient and consistent inspection process.
Handling Features Beyond the Baseline
Not every home component or observation is represented in the Baseline. When you encounter something beyond the Baseline, use the appropriate reporting page to document it: Focus Pages, Black Box, Extras.
Focus Pages
Focus Pages are pre-built Extras pages designed for larger specialty systems or features that require dedicated documentation beyond the Baseline.
Examples include:
- Elevator
- Chimney
- Sauna
- Steam room
- Hot tub
- Additional attic
- Secondary HVAC system
Rather than building an Extras page from scratch every time you encounter one of these features, simply insert the appropriate Focus Page and use the reporting structure that's already been prepared.
If a suitable Focus Page doesn't exist, document the component using the Extras page instead.
Think of a Focus Page as a pre-built Extras page for a common specialty feature. The goal is to leverage the work that's already been done for you, allowing you to stay focused on the inspection rather than building report pages.
Black Box Page
Immediately following the Baseline page is the Black Box page.
Use the Black Box page to document small to medium observations or deficiencies that do not require supporting photographs. Simply type your notes or use talk-to-text to capture them without interrupting your workflow.
Examples include:
- Minor maintenance items
- Cosmetic concerns
- Informational notes
- General observations
Extras Page
Immediately following the Black Box page is the Extras page.
Every section already includes an Extras page so it is available whenever photographic documentation is needed.
Use the Extras page for deficiencies, concerns or additional components that benefit from supporting photographs but do not have their own Focus Page.
Examples include:
- Structural concerns
- Roofing deficiencies
- Attic deficiencies
- Mechanical concerns
- Electrical concerns
- Plumbing concerns
- Safety concerns
- Additional components beyond the Baseline, such as a bidet
If a photograph improves the client's understanding of the condition, the Extras page is usually the appropriate place to document it.
If you don't use an Extras page during the inspection, leave it in place and continue working. During your final review, simply remove any unused Extras pages to keep the published report clean and concise.
Additional Extras pages can be added or reordered if more photographic documentation is required.
Example: Following the inspectagram Process
When you enter a bathroom, begin by working through the Baseline icons from left to right on the template, documenting the expected components such as the electrical receptacle, exhaust fan, shower or tub, faucet, sink drain, P-trap, toilet, walls and ceiling, flooring and bath surround.
Once the Baseline is complete:
- If the bathroom contains a larger specialty feature, such as a steam shower, insert the appropriate Focus Page to document it.
- If you notice smaller observations that do not require photographs, such as minor caulking deterioration or paint defects, capture them on the Black Box page using talk-to-text.
- If the bathroom contains an additional component that isn't represented in the Baseline but doesn't warrant its own Focus Page, such as a bidet, document it on the Extras page.
Then move to the next section of the template and repeat the same process.
Common Mistakes
Complete the Baseline first, then return to document any exceptions.
The icons are not simply places to store photographs. They create the flow of the inspection.
If a pre-built Focus Page already exists for a specialty feature, use it instead of creating an Extras page from scratch.
- Use Focus Pages for larger specialty systems or features that already have a pre-built reporting structure.
- Use the Black Box page for observations that do not require photographs.
- Use the Extras page for observations or additional components that benefit from supporting photographs but don't require a dedicated Focus Page.
Leave unused Extras pages in place while inspecting and remove them during your final review. This saves time and keeps your momentum going.
Key Takeaway
Trust the template. The icons create the flow of the inspection.
Simply follow the same process for every section:
1. Baseline → 2. Black Box → 3. Extras (including Focus Pages)
Document the home's inventory and condition — the good and the bad.
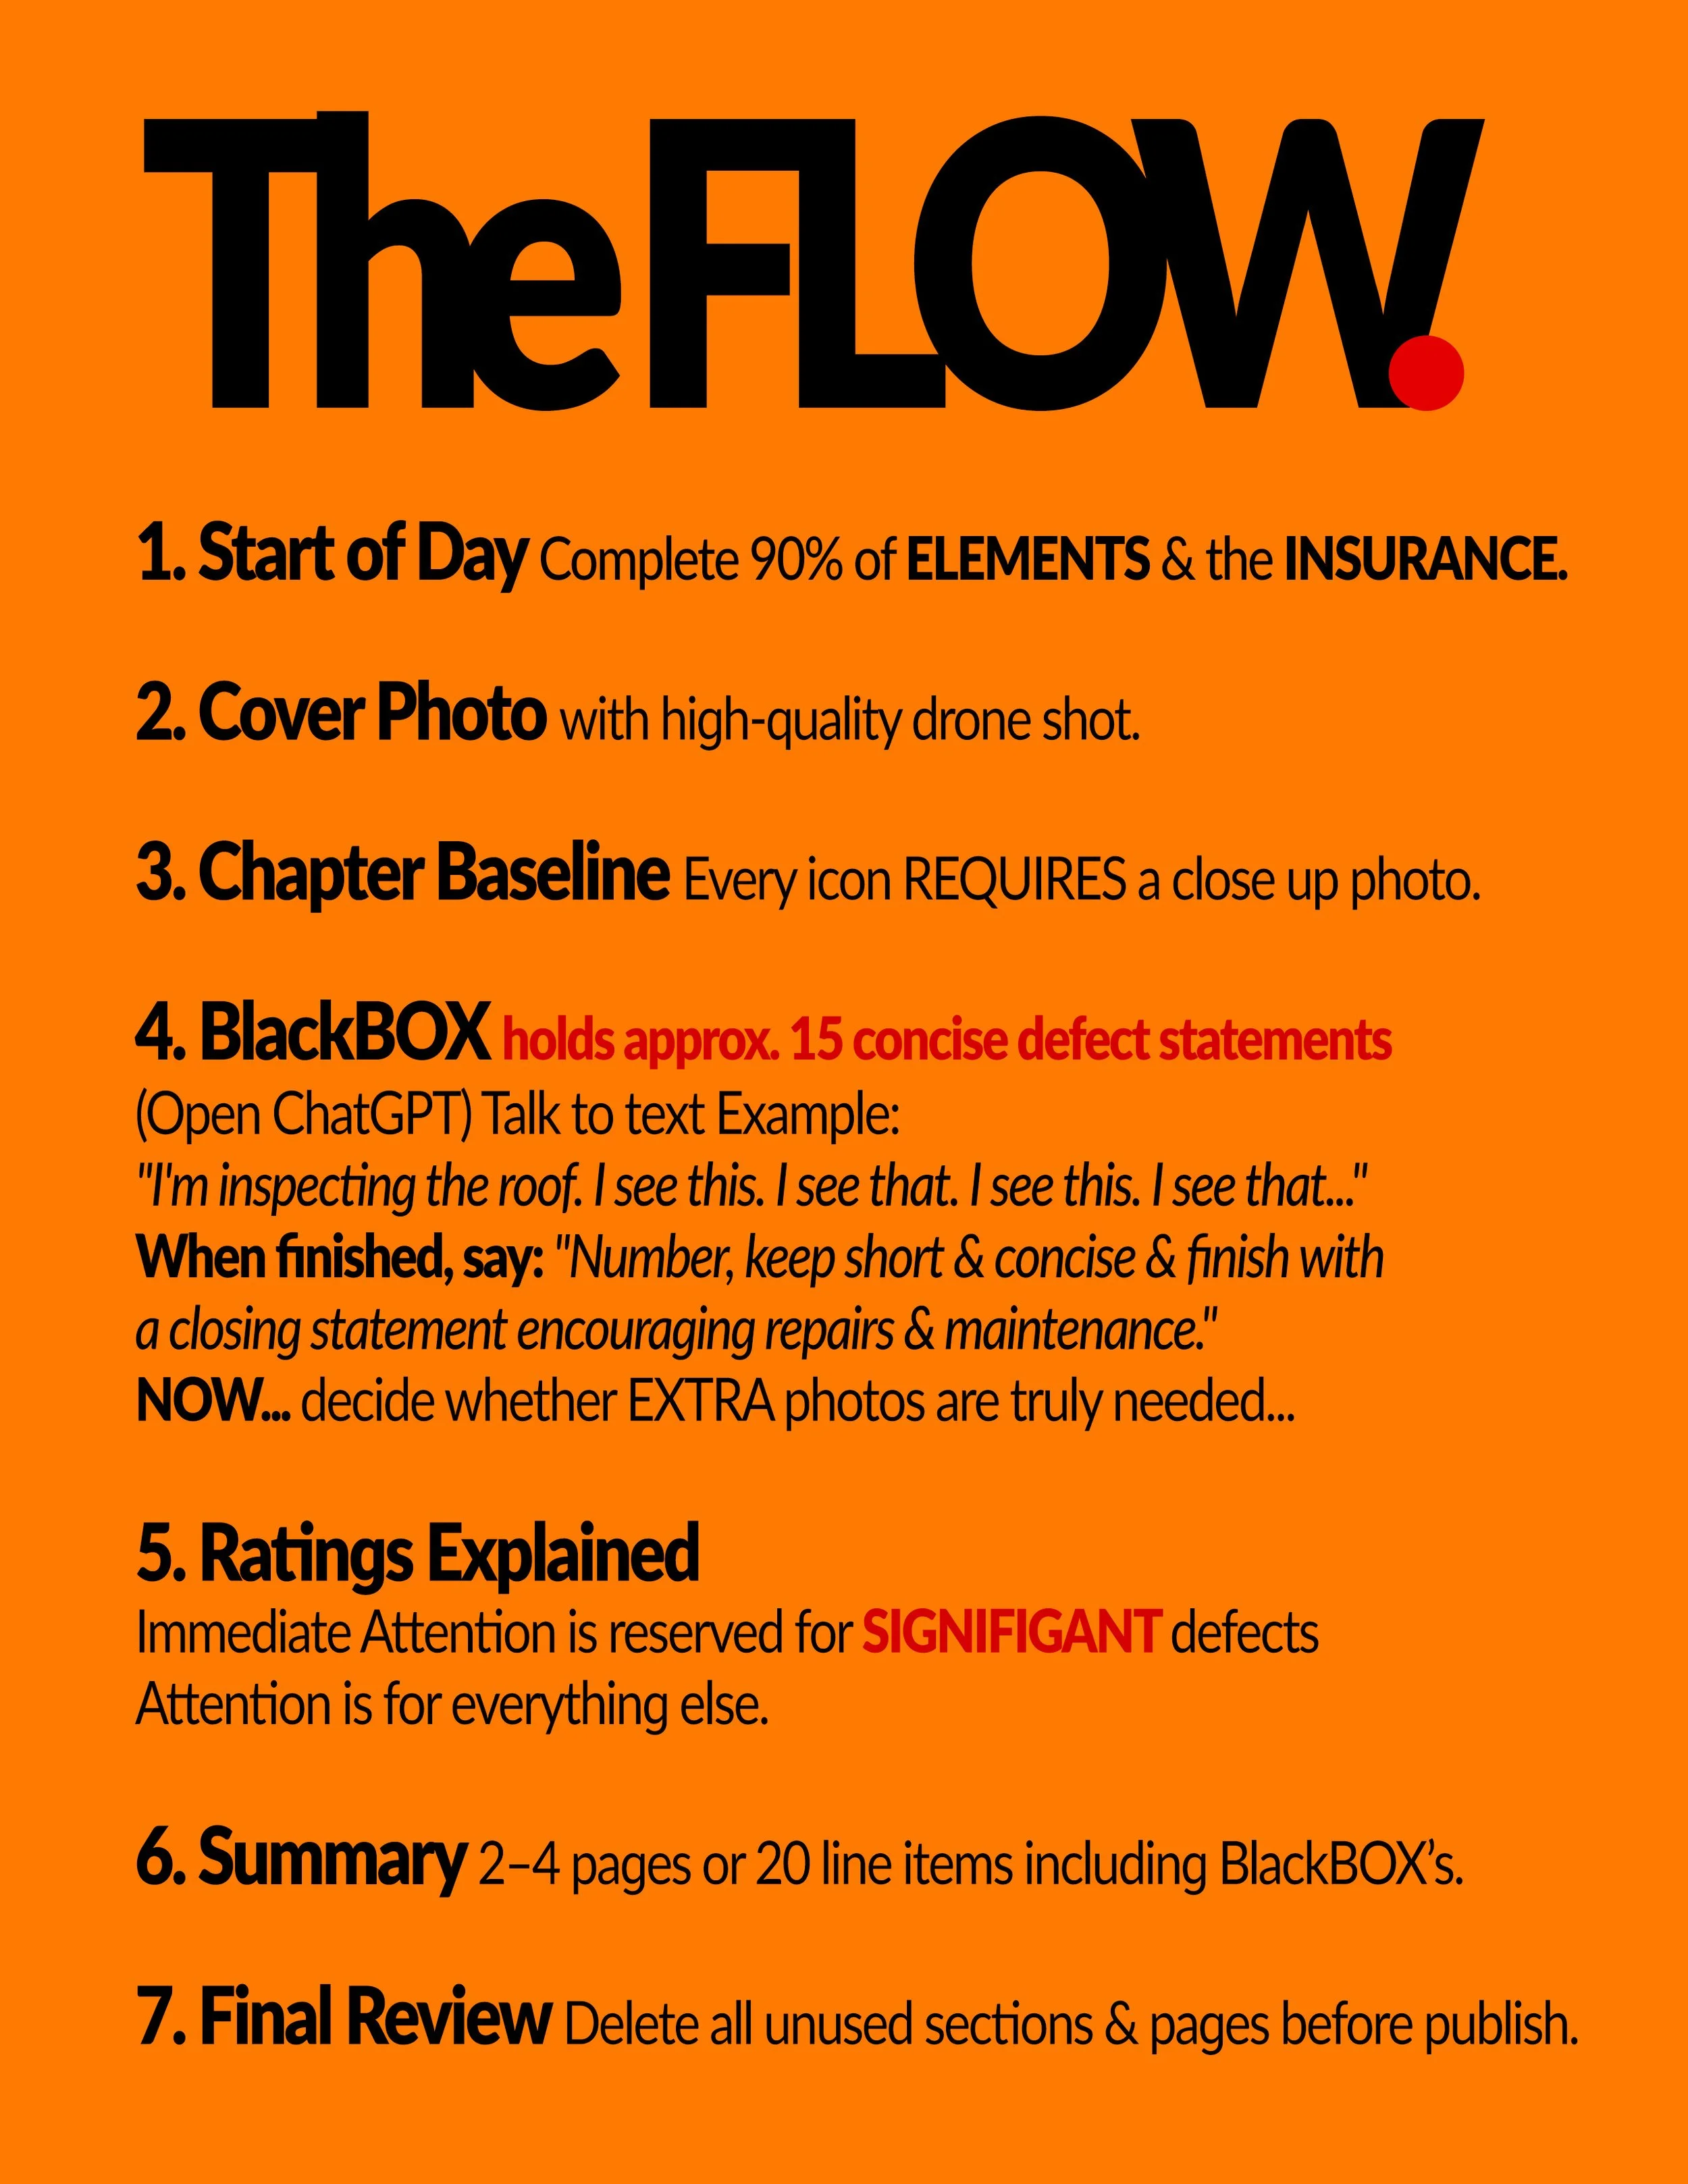
Screenshot and save this image below to use in the field.