Scheduling Inspections Through InspectaHub
InspectaHub makes it easy to manage your availability, accept inspection requests and streamline your booking process.
Once configured, your scheduling workflow becomes:
Set your availability → Share your booking link → Review pending requests → Assign an agreement → Approve the booking.
You remain in complete control of approving every inspection request.
Accessing InspectaHub
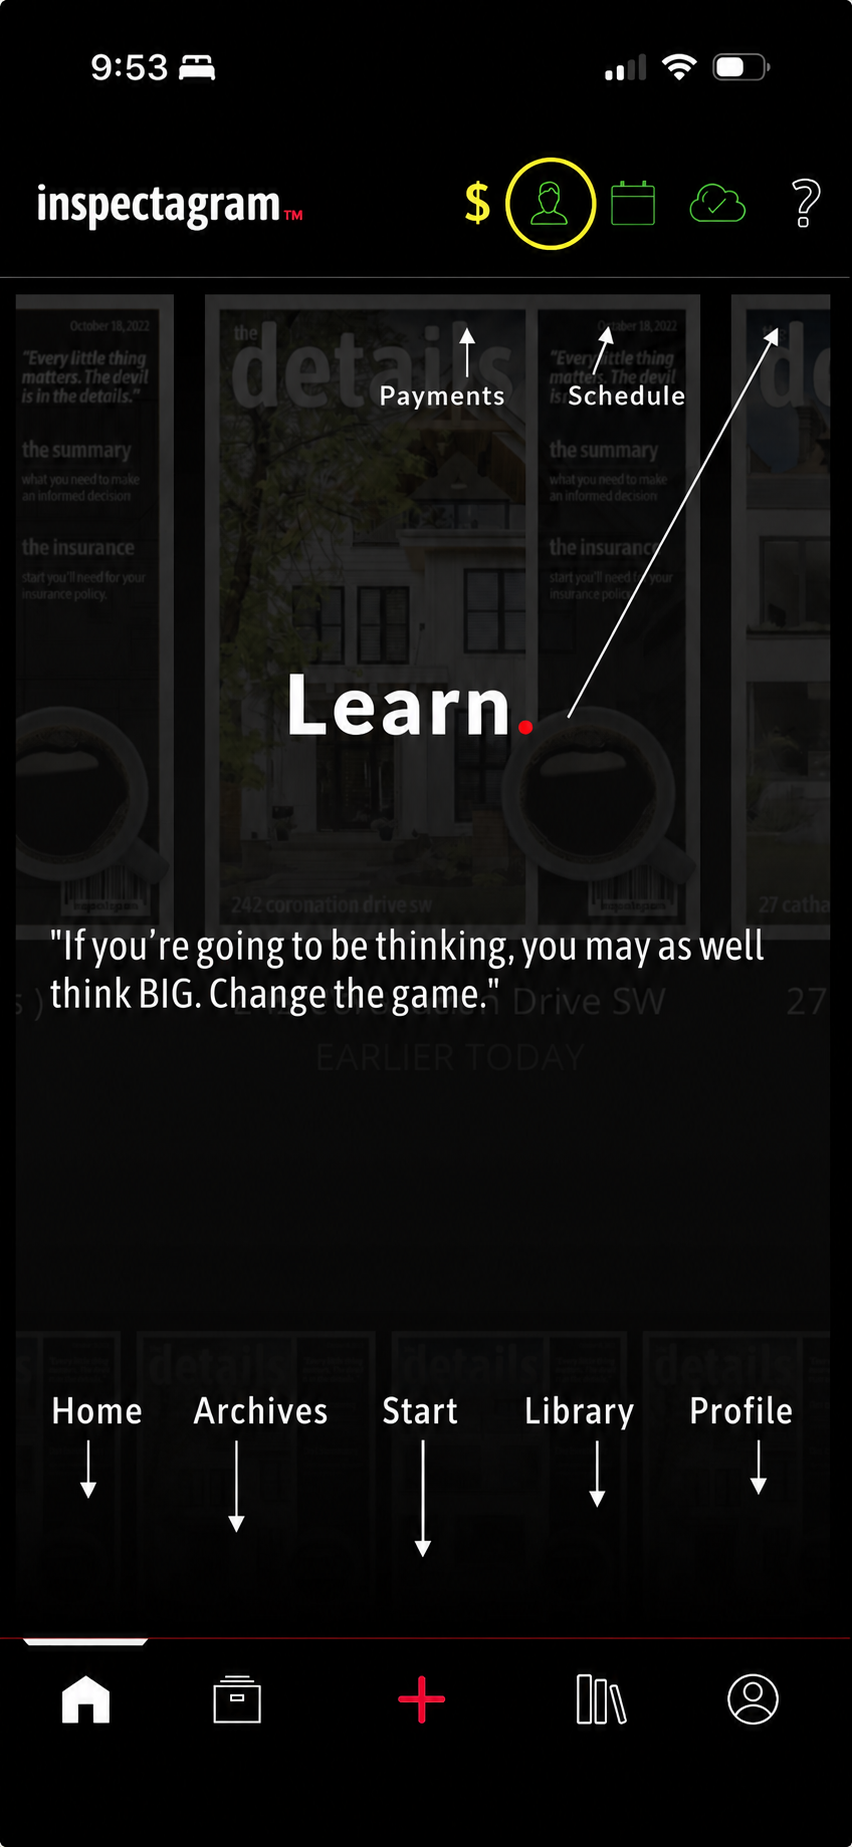
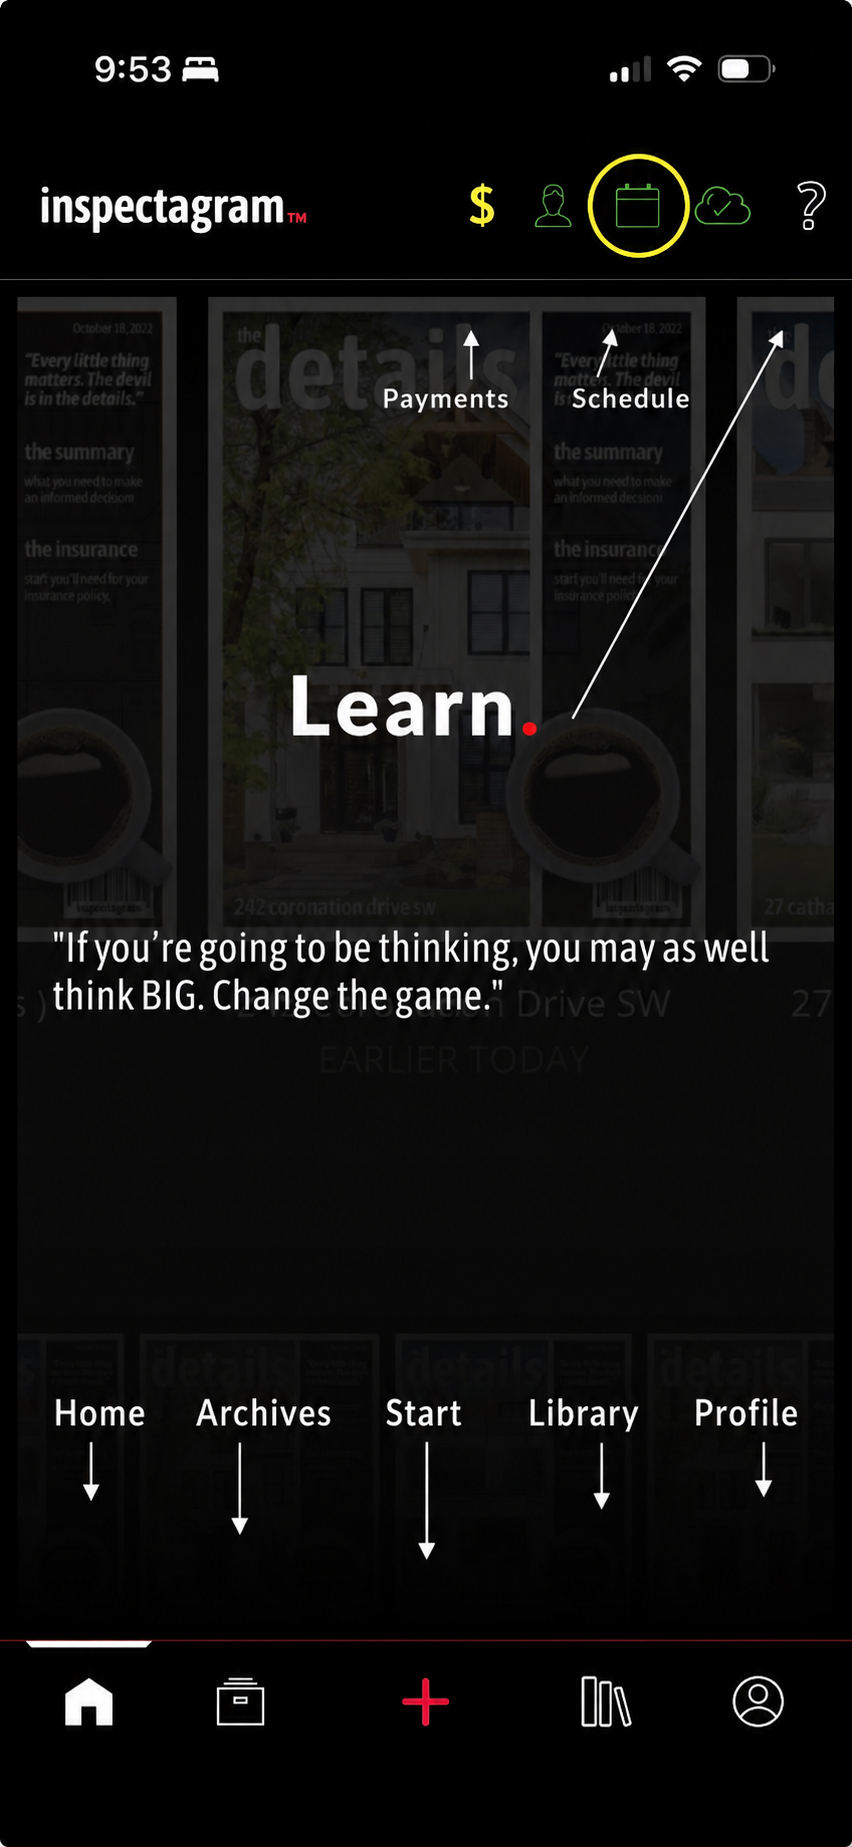
InspectaHub can be accessed directly from the inspectagram dashboard using the two green icons at the top of the screen.
- Person Icon – Set up and manage your inspection availability.
- Calendar Icon – View pending bookings, approved bookings and, if applicable, your team's bookings.
Before accepting appointments, you'll first want to configure your availability.
Step 1: Set Up Your Availability
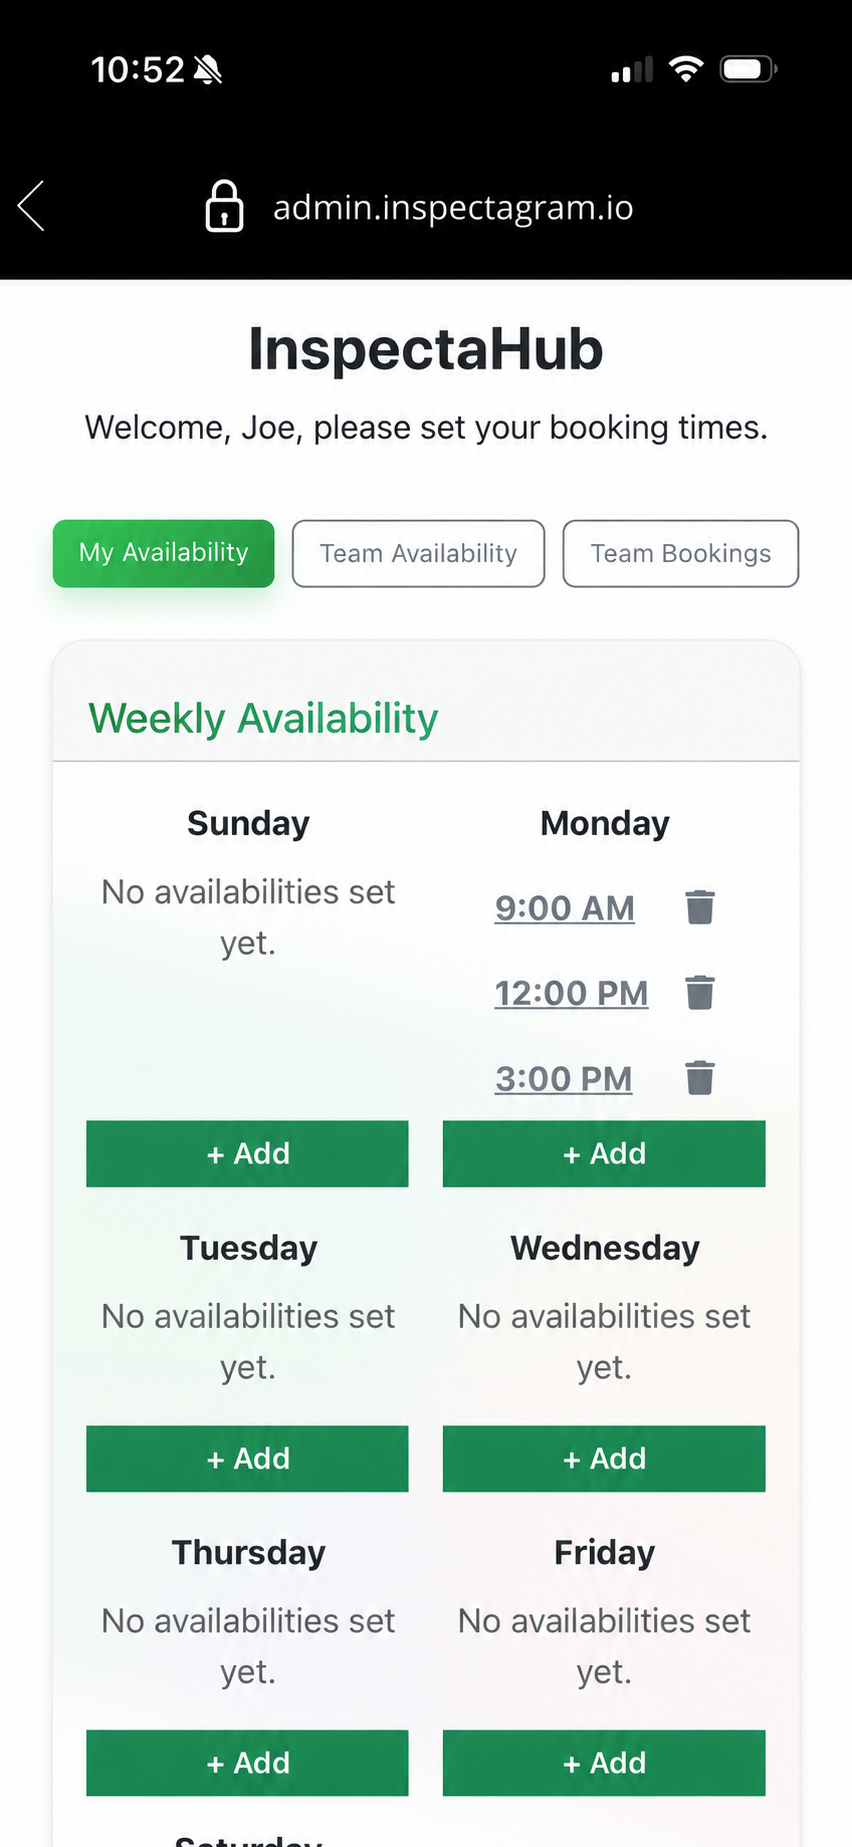
Tap the green Person icon to configure your regular inspection schedule.
Your availability is based on days of the week, not specific calendar dates.
For example, many inspectors choose to make themselves available:
Monday: 9:00 AM, 12:00 PM and 3:00 PM
Tuesday: 9:00 AM, 12:00 PM and 3:00 PM
Wednesday: 9:00 AM, 12:00 PM and 3:00 PM
Thursday: 9:00 AM, 12:00 PM and 3:00 PM
Friday: 9:00 AM, 12:00 PM and 3:00 PM
Configure the schedule that best matches your business and update it whenever needed.
Step 2: Submit Days Off
Taking vacation or unavailable for part of a day?
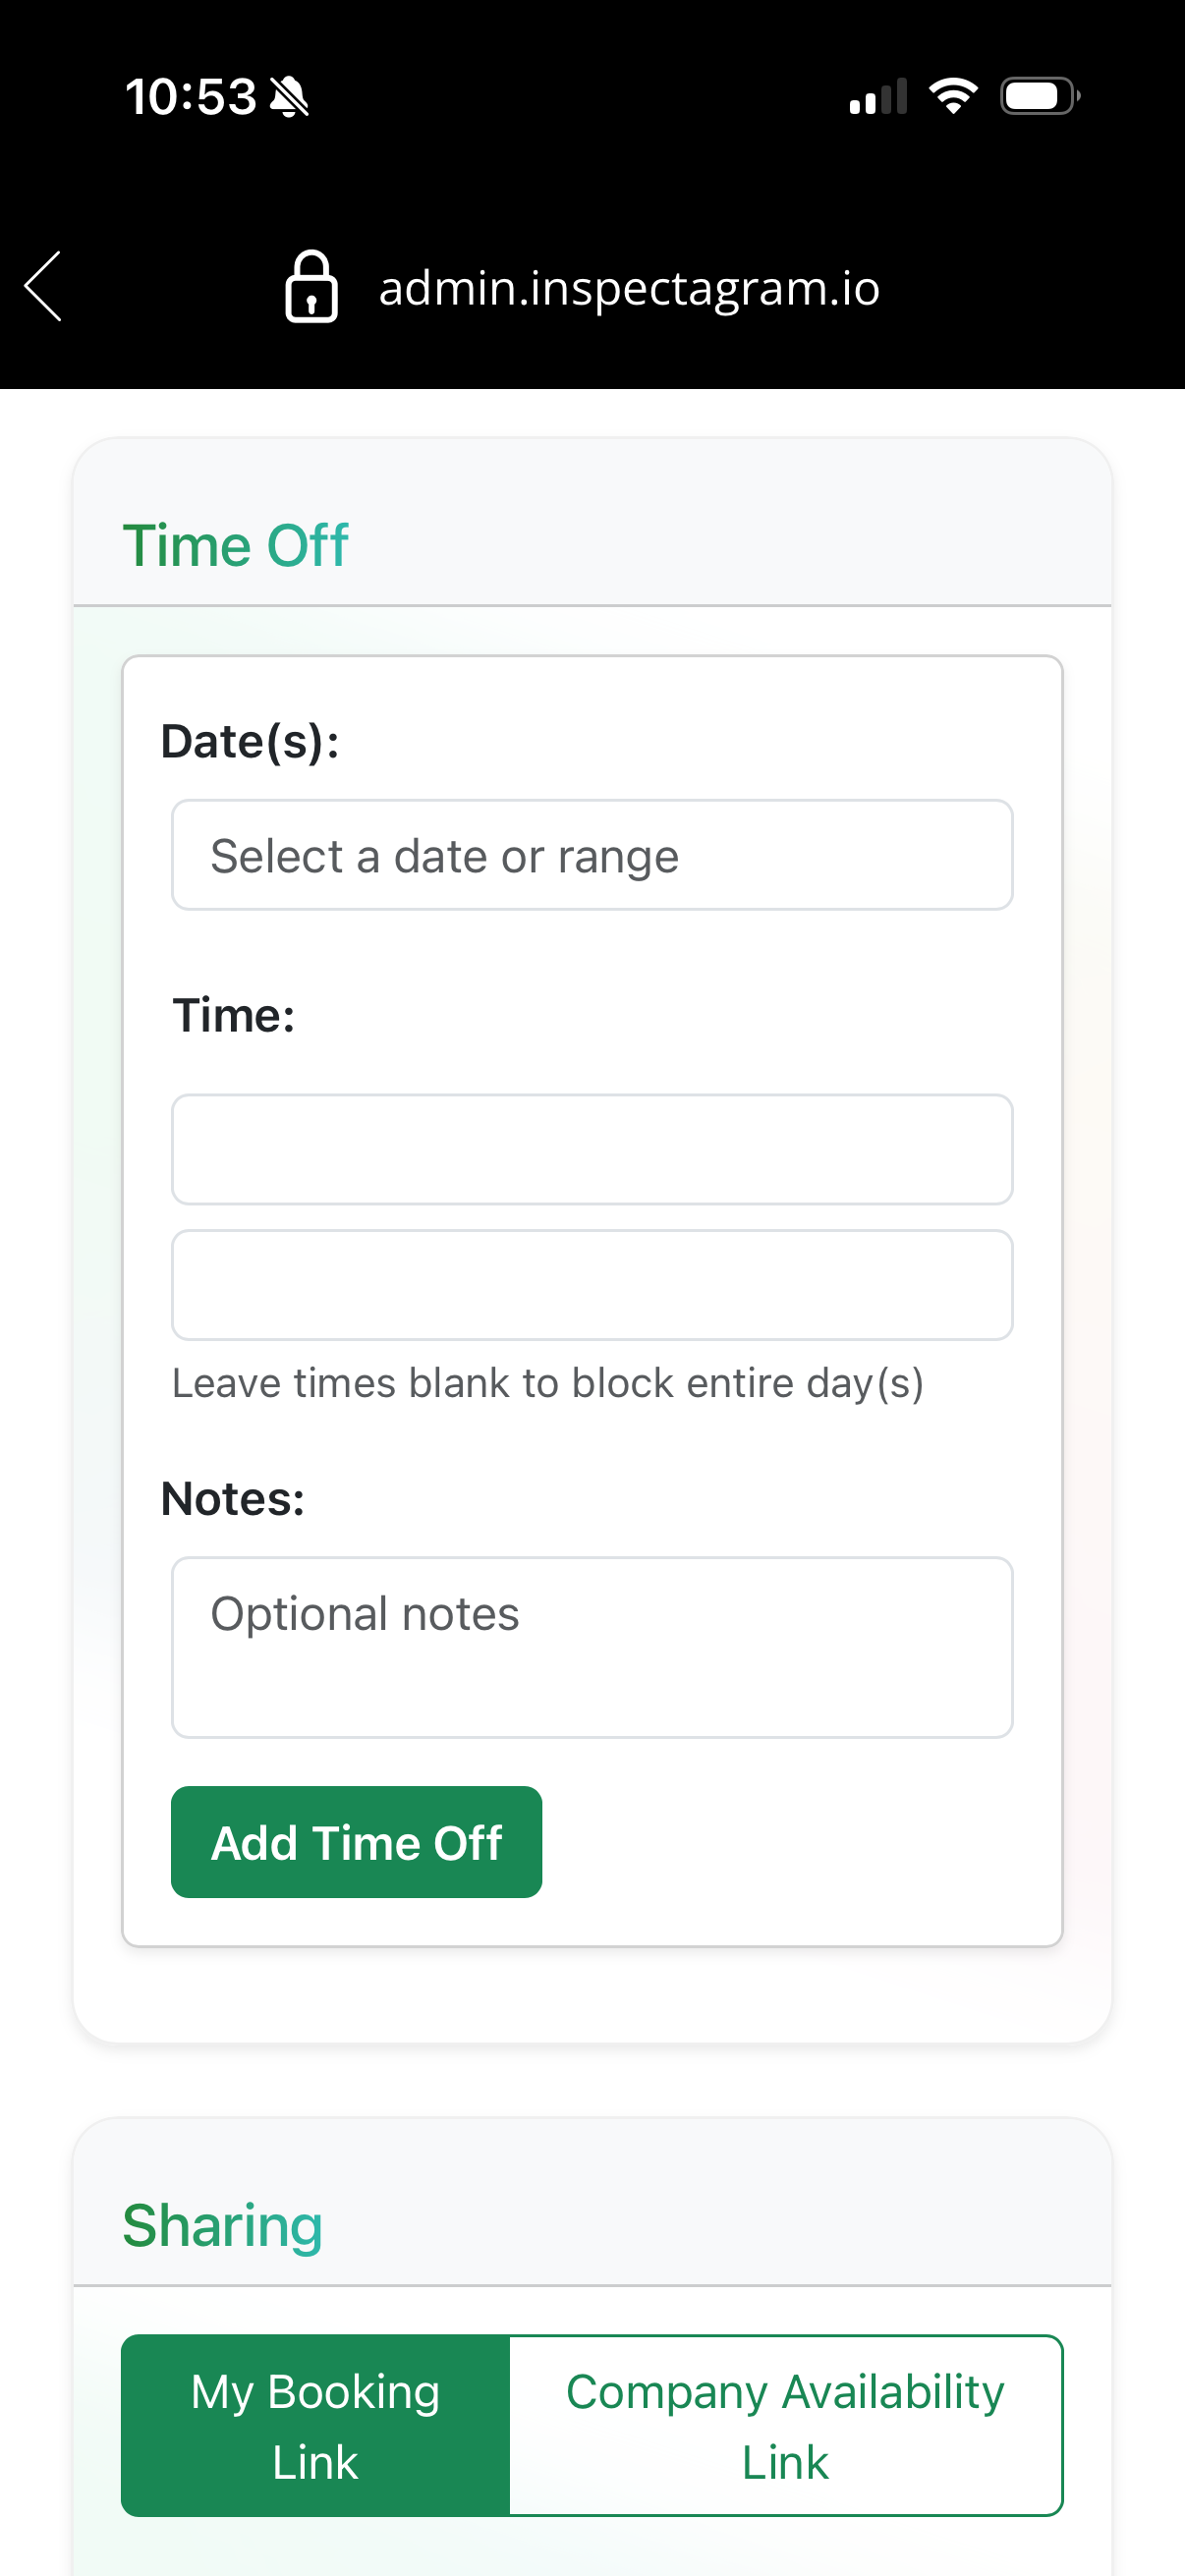
Scroll down within the availability settings to submit Days Off.
This feature allows you to block:
- Individual days
- Partial days
- Extended periods of time
Any blocked periods will automatically prevent customers from requesting bookings during those times.
Step 3: Share Your Booking Link
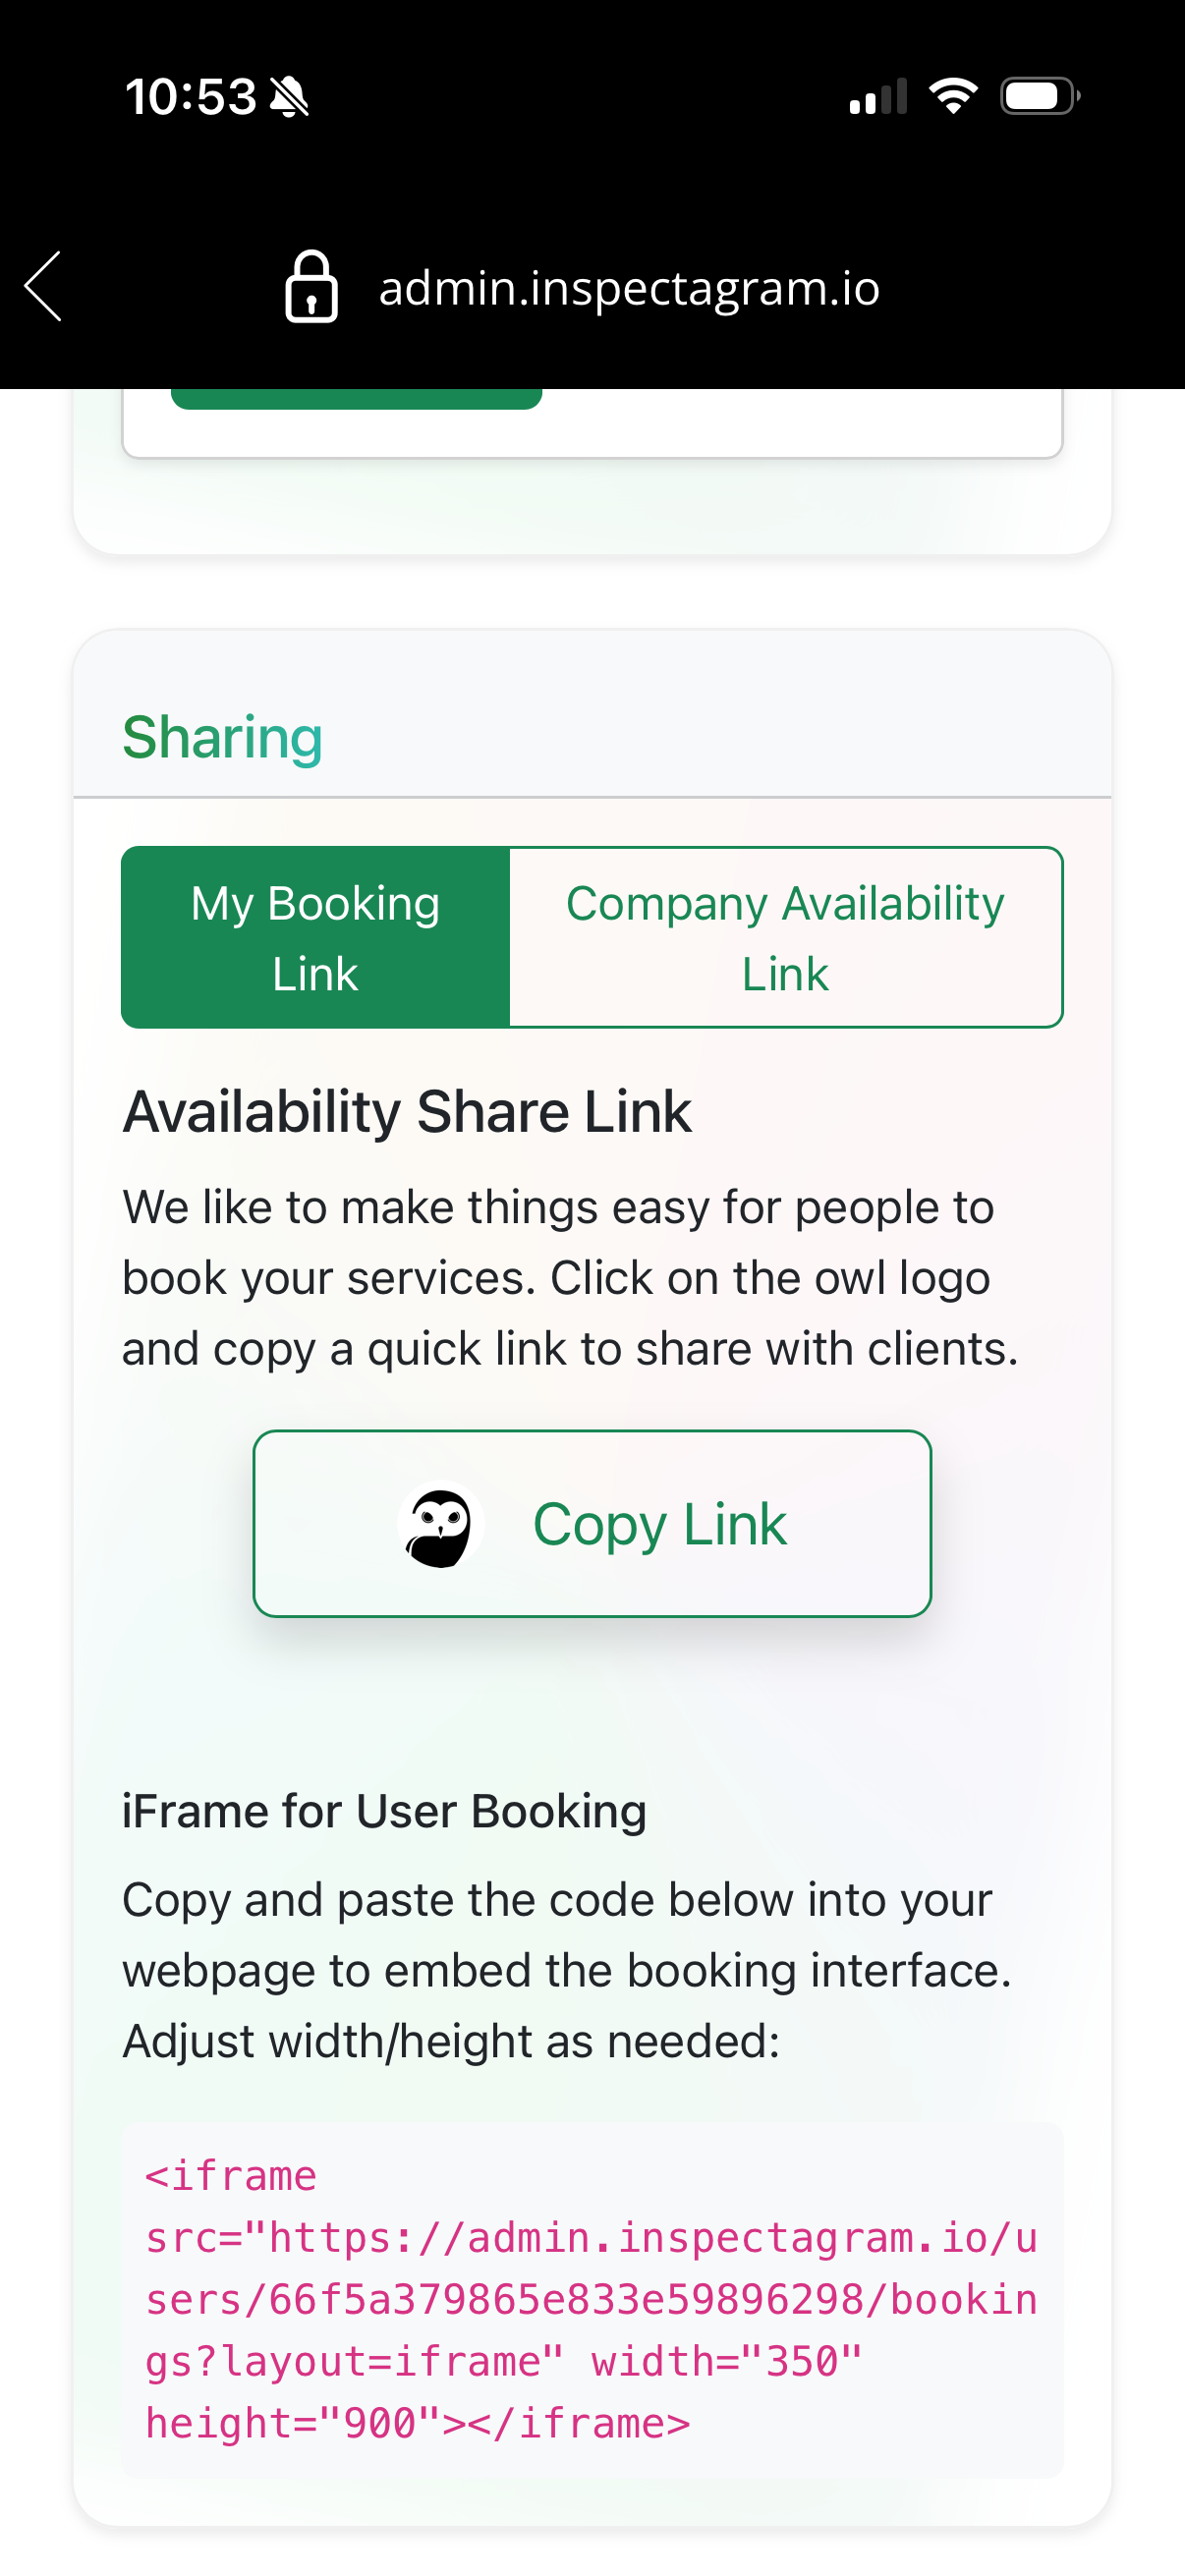
Scroll further down to find your personal booking link.
You can share this link by:
- Text message
- Social media
- Any other communication method
Customers can use the link to request an inspection using one of your available time slots.
You'll also find an iframe embed code that can be added to a code block on your website, allowing customers to request inspections directly from your website without leaving the page.
Step 4: Customer Submits a Booking Request
When a customer selects a date and time, they will complete a booking request by entering their information.
During this process, they also have the option to provide their Realtor's contact information. When supplied, the Realtor can receive communications related to the inspection as appropriate.
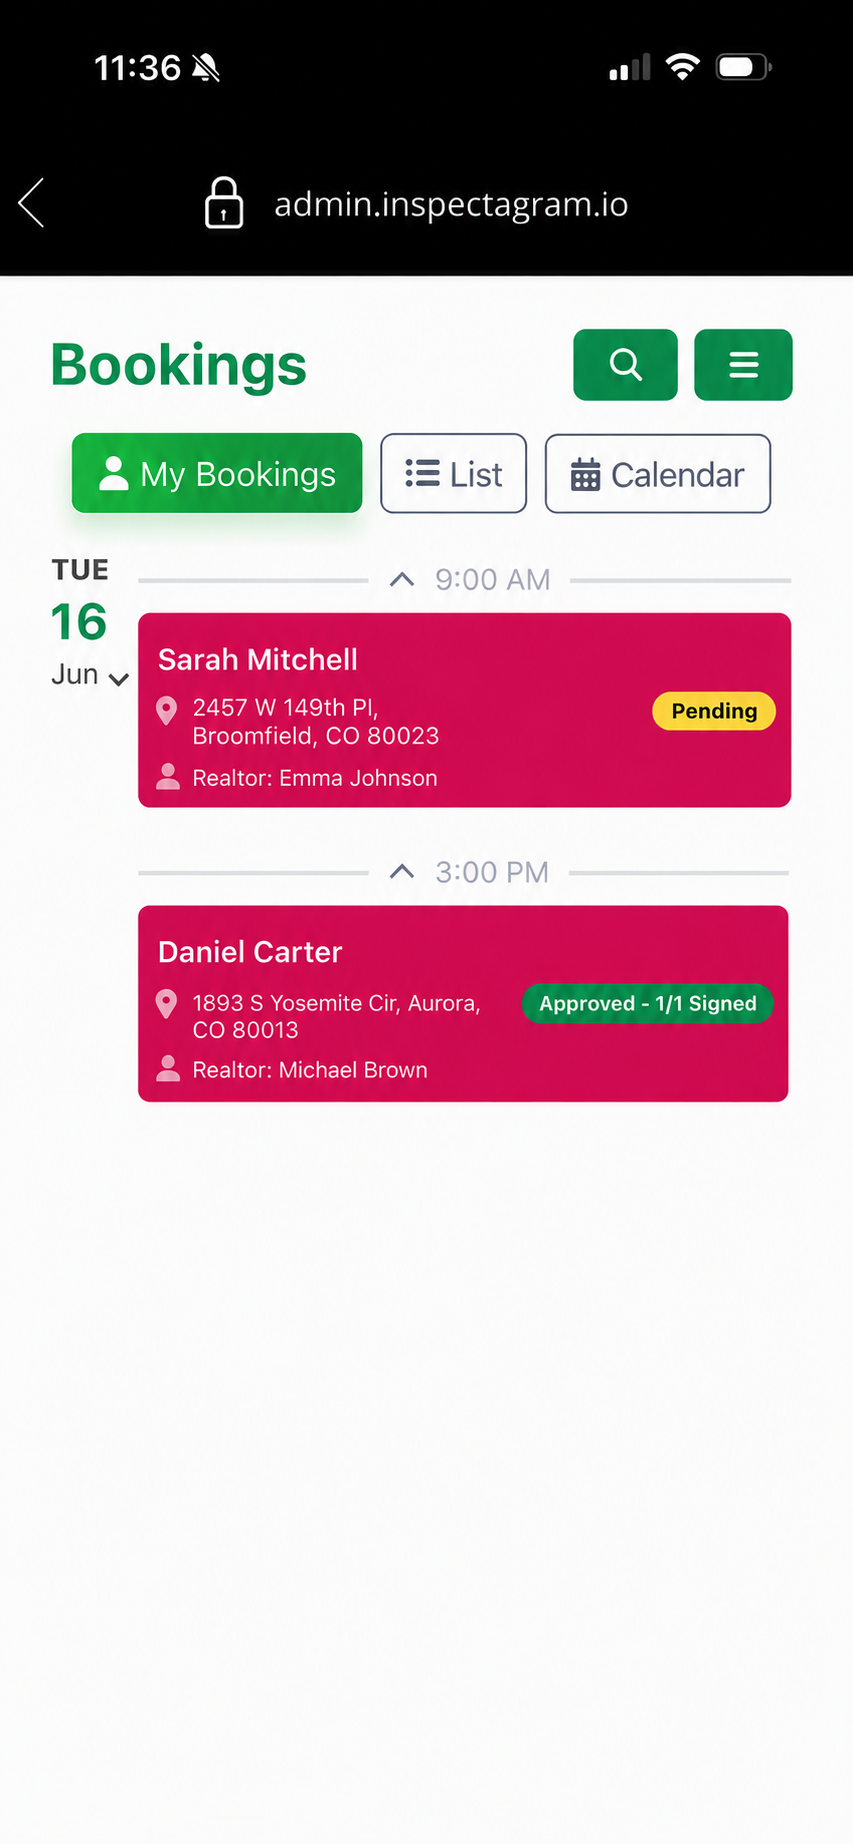
Once submitted, the booking request will appear in your calendar with a yellow Pending indicator until it has been reviewed.
Step 5: Review Pending Bookings
Tap the green Calendar icon to view your booking requests.
Bookings with a yellow Pending indicator require your review.
While a booking remains in Pending status, you can:
- Review the customer's information.
- Assign the appropriate inspection agreement.
- Modify the requested date or time if needed.
- Adjust the requested services if necessary.
Once everything looks correct, approve the booking.
Step 6: Assign an Agreement and Approve the Booking
Each booking should be assigned an inspection agreement before approval.
We highly recommend using the inspectagram Universal Agreement, which can be customized for your local jurisdiction and used across all of your inspection services.
After you approve the booking, the customer will receive an email inviting them to review and electronically sign the agreement.
Once the agreement has been signed:
- The customer receives a completed copy of the signed agreement.
- The inspector also receives a completed copy of the signed agreement for their records.
If the agreement has not been signed before the inspection, it can still be signed on site using the customer's phone.
Approved bookings display a green Approved indicator on the right side of the booking.
You will also see an agreement status indicator:
- 0/1 – The booking has been approved, but the agreement has not yet been signed.
- 1/1 – The booking has been approved and the agreement has been signed.
Important: Editing Bookings
Bookings can only be modified while they are in Pending status.
Once a booking has been approved, it can no longer be edited, even if the agreement has not yet been signed.
If you need to change the appointment date, time or services after approval, you must create a new booking and cancel the original booking.
For this reason, always verify the booking details before approving the request.
Viewing Your Bookings
Within the Calendar screen, you can choose:
- My Bookings – View only your personal inspection schedule.
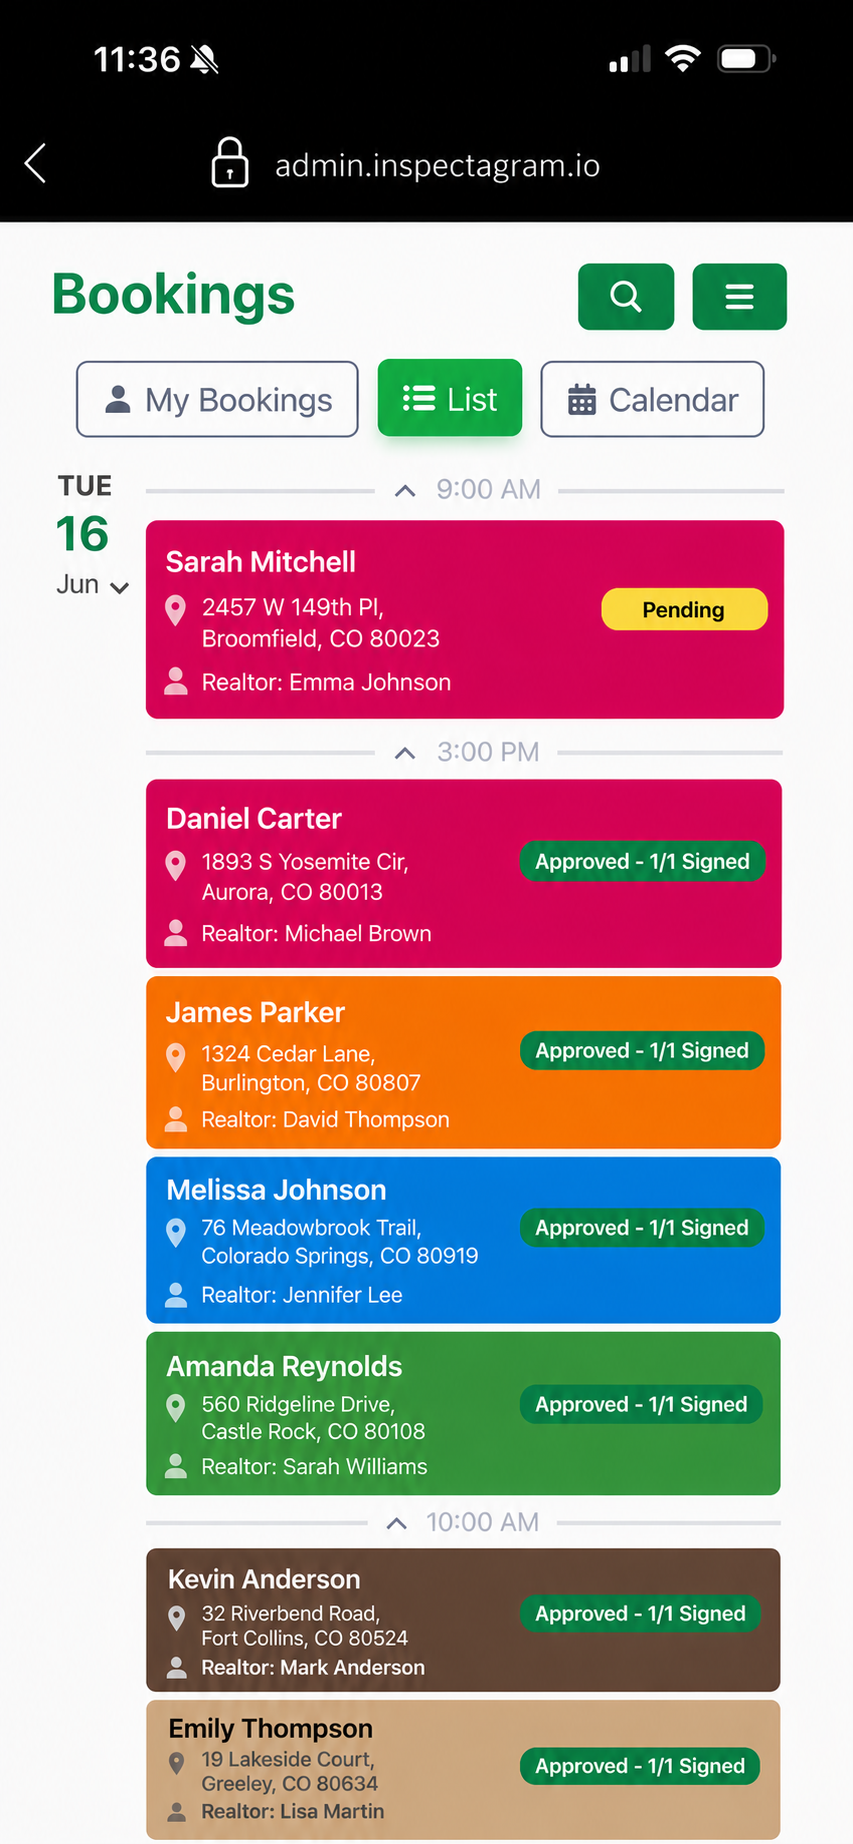
- My Team – If you're part of a team, view bookings for all team members.
This provides a centralized place to monitor upcoming inspections, pending requests and agreement statuses.
Best Practices
- Configure your recurring weekly availability before sharing your booking link.
- Use Days Off to block vacations and schedule changes.
- Review every pending request before approval.
- Assign an inspection agreement before approving the booking.
- Verify the requested services and appointment details while the booking is still pending.
- Encourage customers to provide their Realtor's information when applicable to simplify communication.
Set up your Availabilities and Time off
See images below
Access Availability Settings from the Dashboard (tap the green Person icon)
Set Your Weekly Availability (your recurring business hours)
Add Time Off (temporary exceptions to your recurring business hours)
Share Your Booking Link (send it via text or email, or embed it on your website using the provided iframe code)
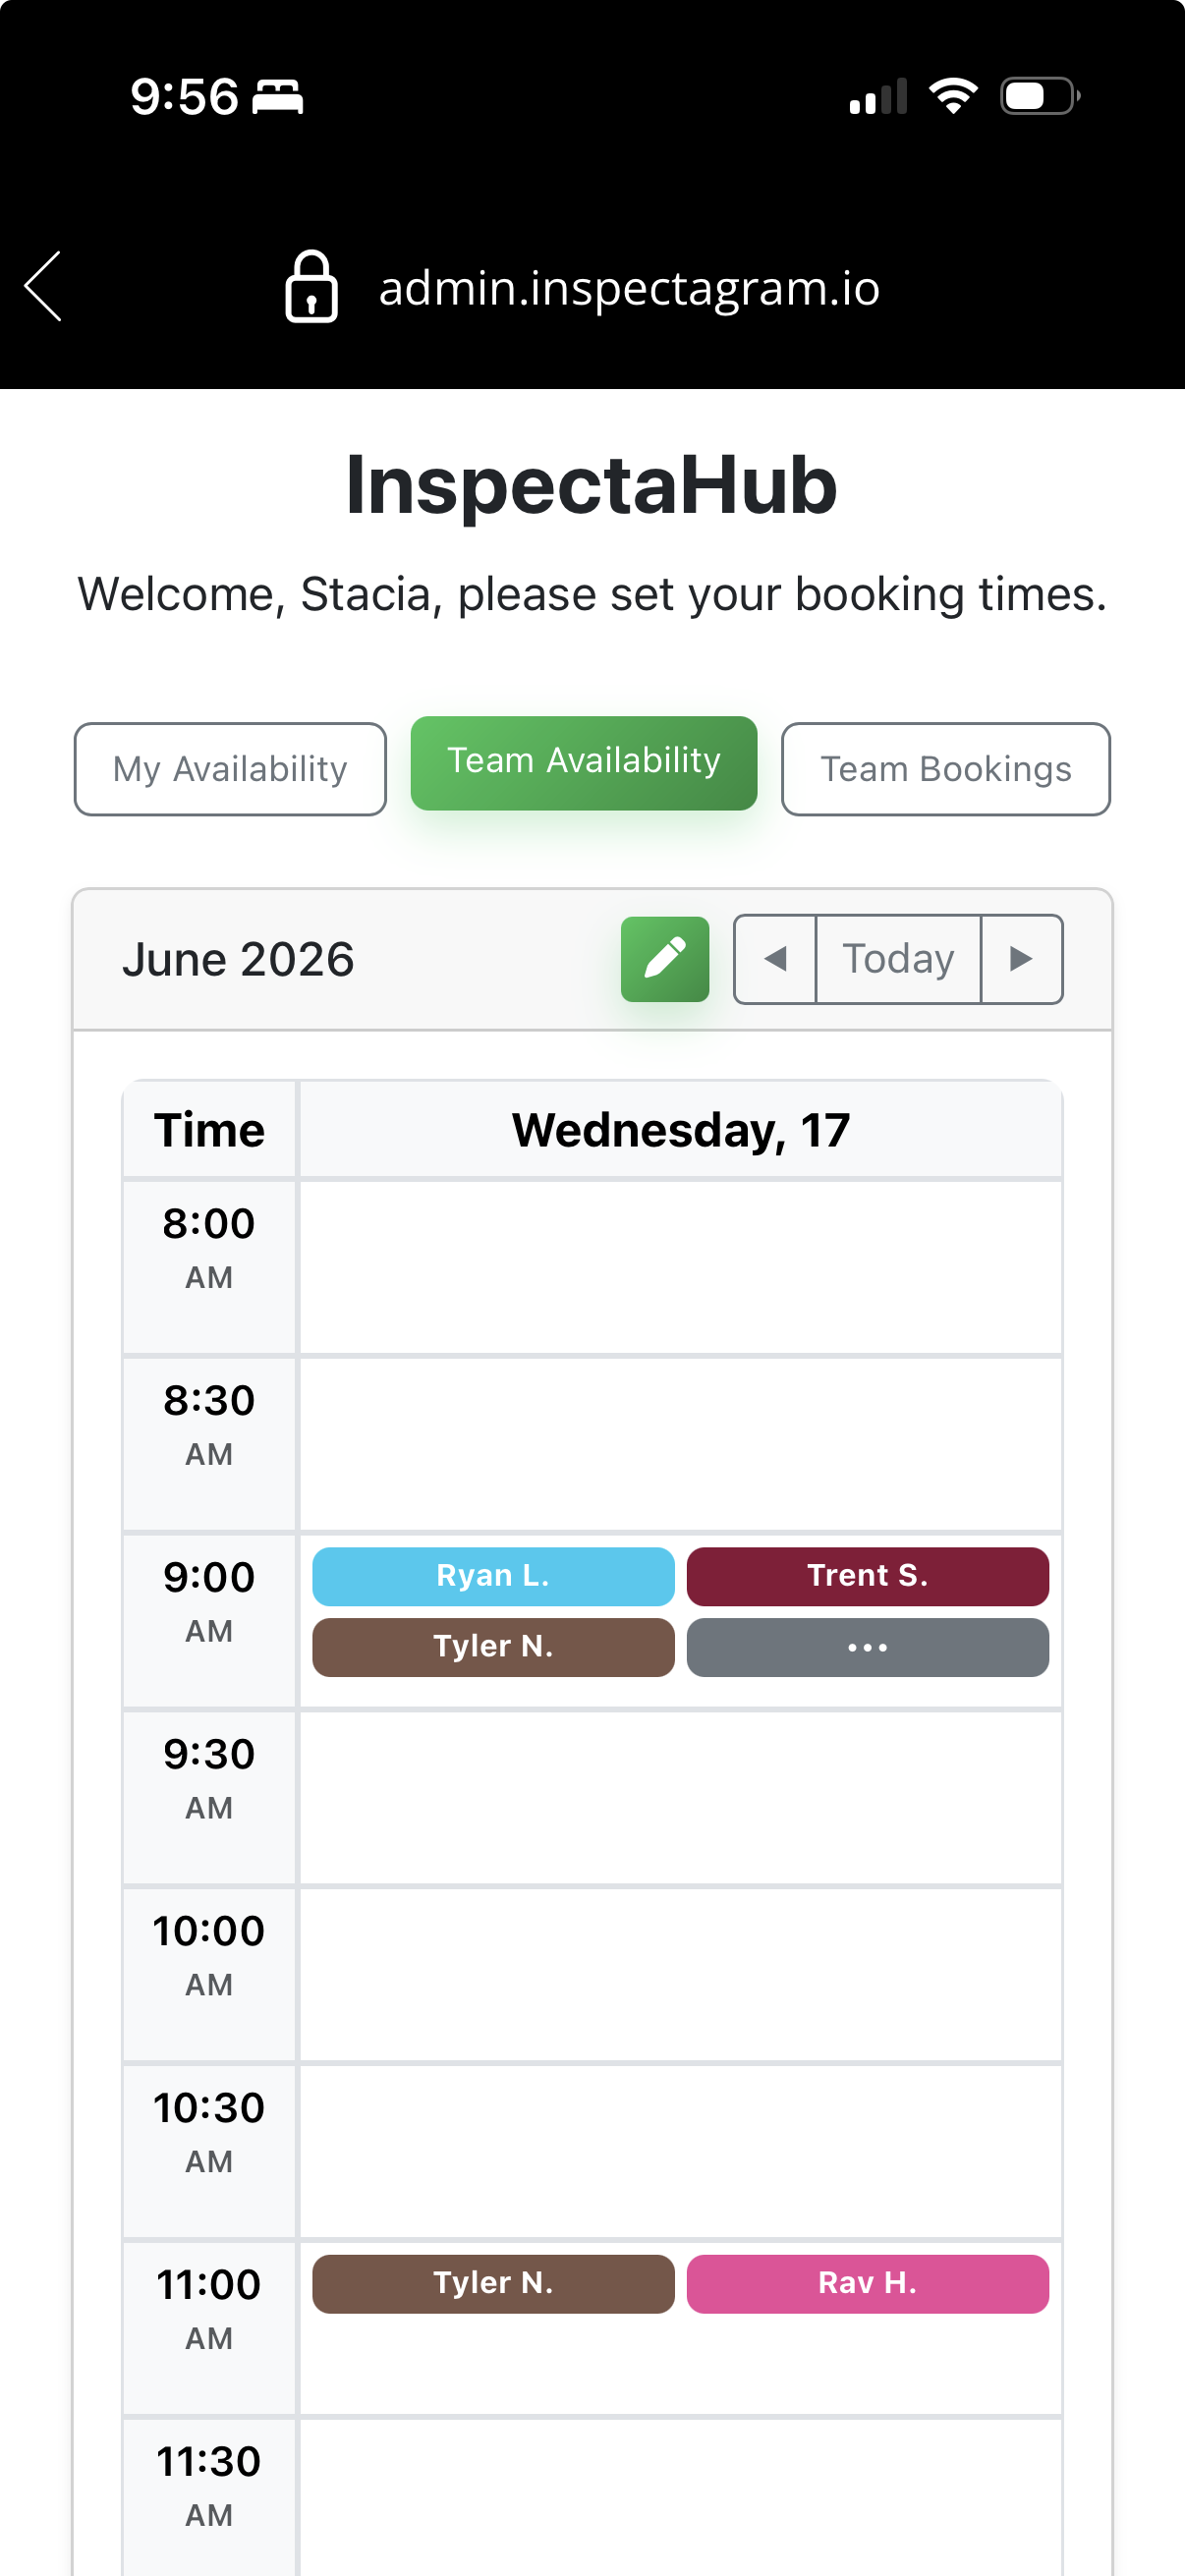
View Team Availability (see when other team members are available for bookings)
Access Your Bookings from the Dashboard (tap the green Calendar icon)
View Your Bookings (see all pending, approved, denied and cancelled bookings)
View Team Bookings in List Mode (see pending, approved, denied and cancelled bookings across your entire team)
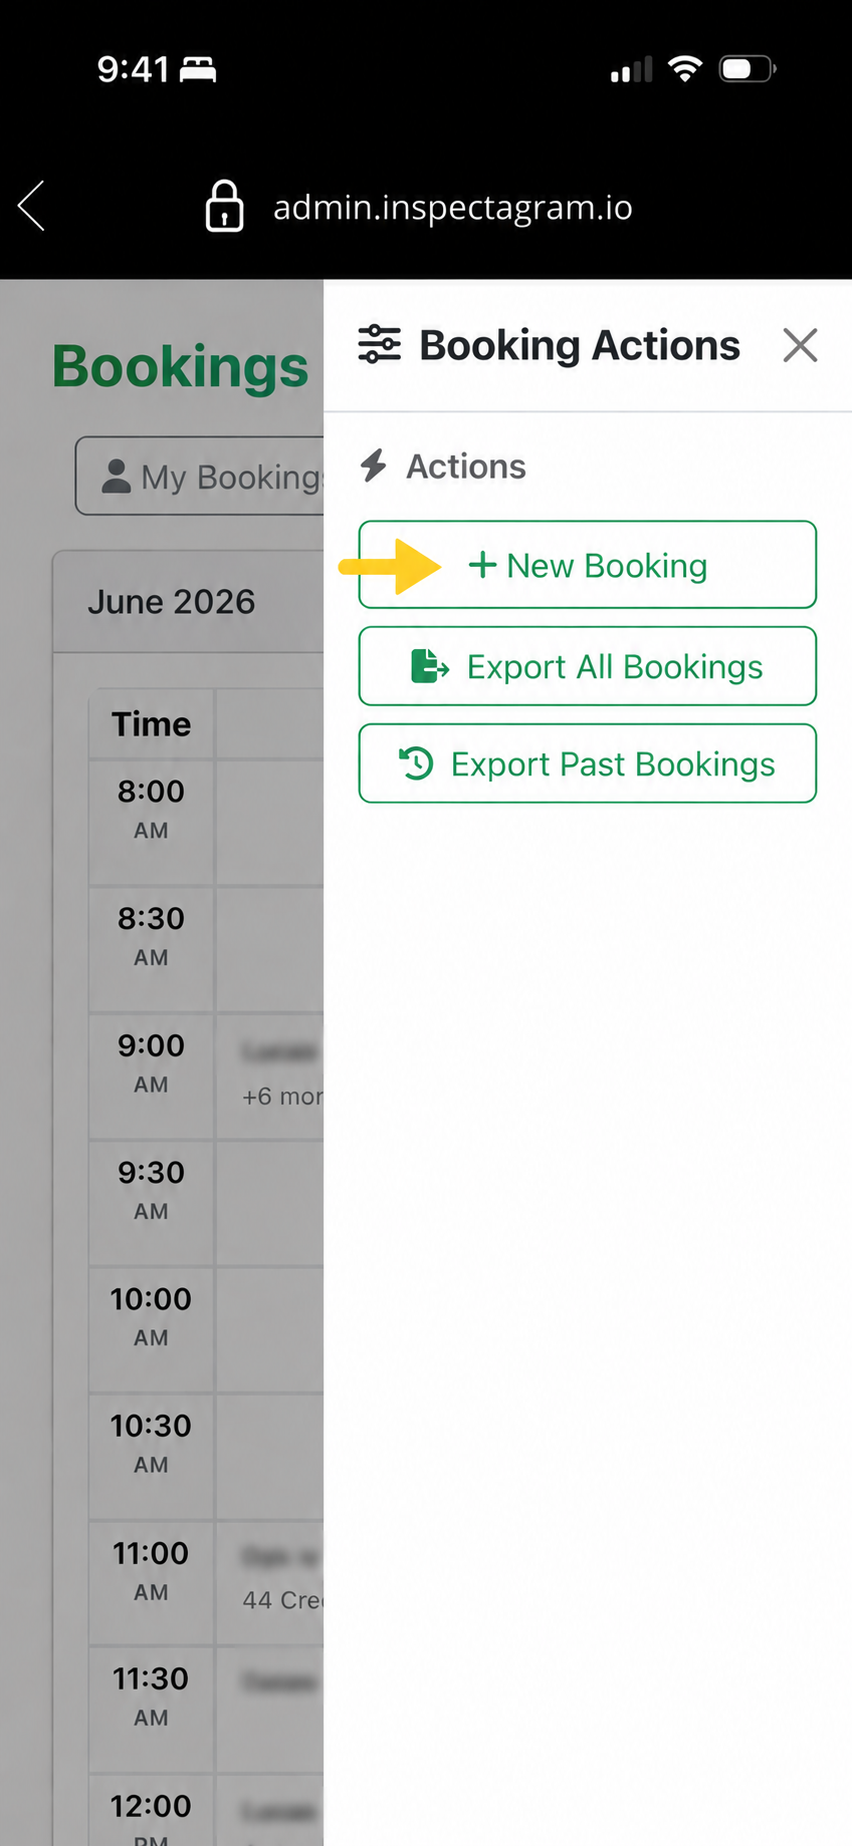
Create a New Booking(manually create a booking request on behalf of a client)
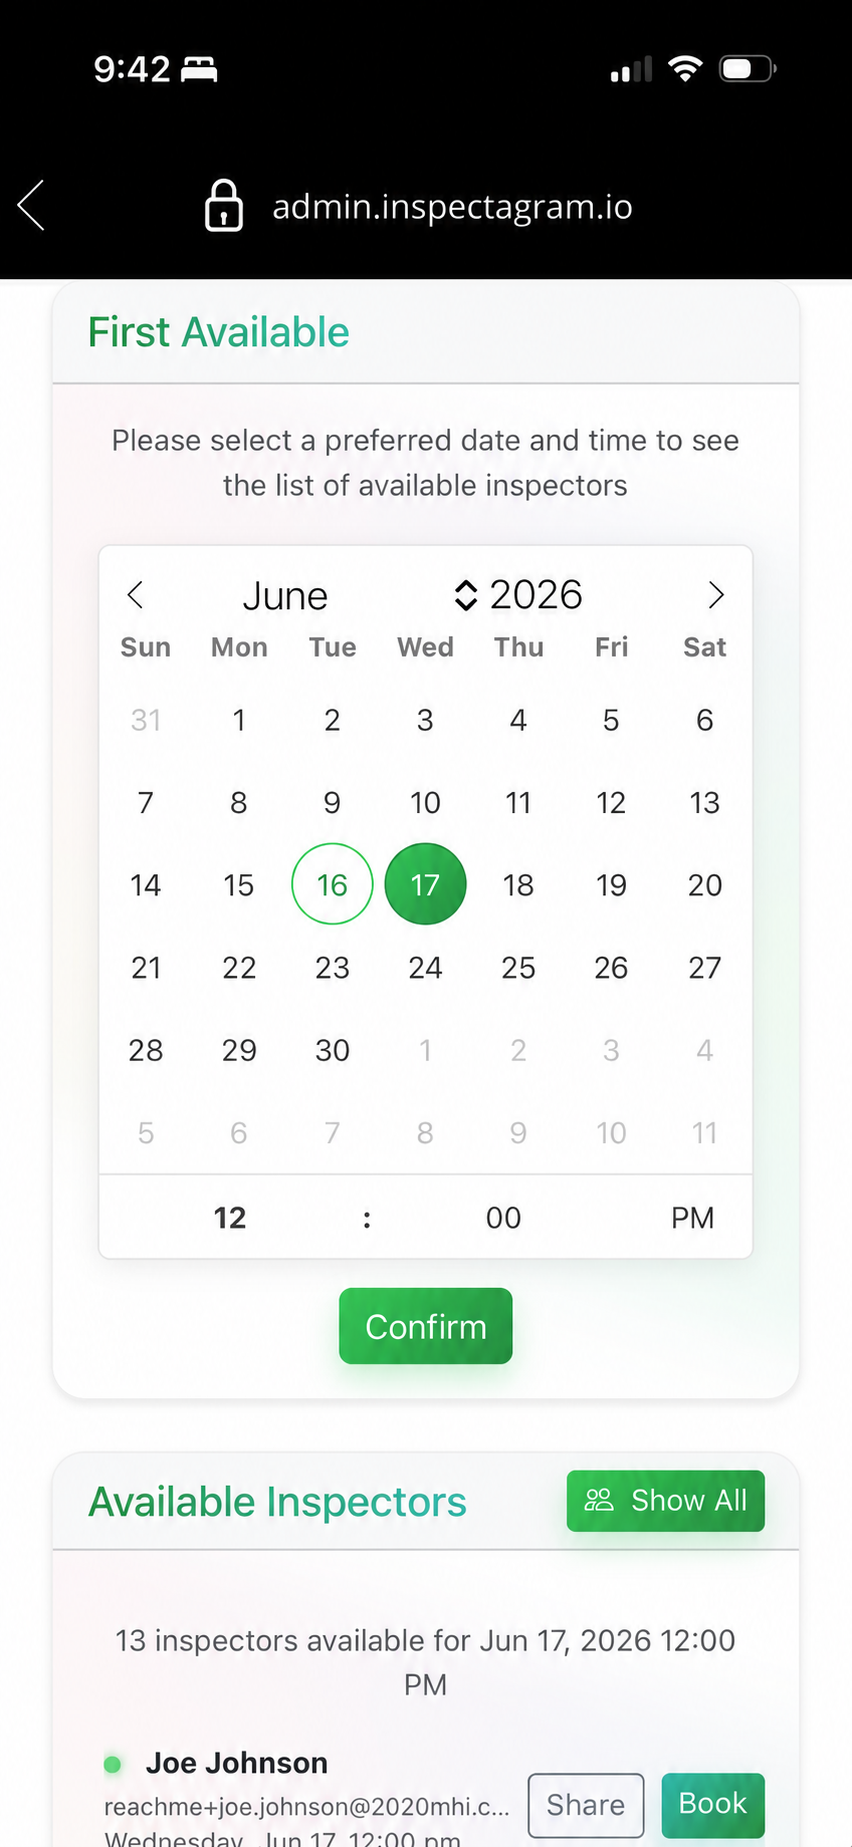
Find an Available Inspector(select a date and time to view available inspectors. If you're unavailable, you can share another team member's booking link or create the booking request for your client.)